Google online DPI converter
If you want to change the DPI of your PAN card photo and/or signature like in 100 dpi, 200 dpi, 300 dpi, 600 dpi then follow the steps given below
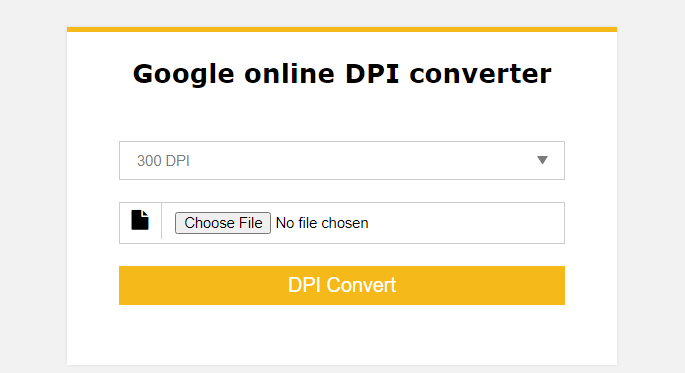
Click on the below button to change the DPI of any image
Upload your image to fix the image's DPI
Select the DPI in which you want to convert your photo or signature, if you do not have the DPI of your choice, then select Other DPI, then the box will open for you to enter the DPI
After uploading the photo click on DPI Convert button
Whether you’re creating a website, publishing a blog post, or running a social media account for your business, users expect properly-sized, high-quality images. By knowing how to resize images without losing quality, you’ll help your brand look professional and establish trust with users.
Use this free tool to change the DPI of your image instantly
Choose a new DPI value (by clicking on the number bar e.g. 200 or 300, 600 DPI )
Select your image file (press the "choose image" button)
Your new image (with your chosen DPI) will instantly download to your device
The DPI (dots per inch) of an image is simply metadata embedded inside the image (header). The actual quality (resolution) of the image (within the file itself) is not affected when its DPI value is adjusted.
The DPI value is read by some devices (such as printers) to determine how your image should be presented on a medium (such as paper). For example, a printing shop may request that a photo is submitted with 300 DPI rather than 72 DPI. The printer would then output a larger number of dots for every inch, resulting in a sharper image.
How to change dpi photo and signature online free without losing quality
Imagine two ecommerce sites selling the same pair of shoes — one has blurry and/or distorted product screenshots, and the other has crystal clear ones. Which are you more likely to buy from?
Well-formatted images don’t just make the browsing and purchasing experience easier — they also convey professionalism. On the flip side, messy images can imply a lack of competence. If you can’t get your images right, how can you get your products right?
In addition to impacting the user experience in these ways, images that aren’t properly resized affect website performance. Oversized, high-resolution images might look good on the front end, but their file sizes are large. That means browsers will take longer to load them, which will increase your website’s overall load time.
Often, this extra load time is unnecessary. Say you have an image that is 2000 x 2000 pixels but the container it’s going in is only 200 x 200 pixels. In that case, your browser still loads every pixel even though it’s constrained to a much smaller display area. That means the browser has to load ten times more than what’s necessary.
There’s no standard width or height you should aim for when resizing your images. It will depend on a variety of factors, including where you’re putting them on your website, whether the majority of your visitors are using desktop or mobile, and so on.
Still, a rule of thumb is that you want to strike a balance between the lowest file size and an acceptable quality. Generally, an image file size of 100KB or less is acceptable. Some quality loss will happen, but it won’t be noticeable if done properly.
An image DPI value may be changed by opening the file inside MS (Microsoft) Paint, Adobe Photoshop or Illustrator. However, it is much simpler to change the DPI of an image using the tool provided above.
When you begin to digitally process your photos, one of the first terms you'll come across is DPI. Abbreviation DPI stands for "dots per inch", and is related to the quality of your photo. In general, the higher the DPI of an image, the higher its quality. This is due to the fact that the resolution of the image is higher, and therefore the image has more details. But for high quality you have to pay.
There are many cases where high image quality is not necessary. For example, for images on the Internet, 72 DPI is usually used. This is very small, but for Web pages this is acceptable, since, although the images are far from perfect, they are small in size, and are loaded more quickly. For images in Windows, 96 DPI is used. This is a little better, but still does not go in comparison with the resolution used to print images.
When printing images, different resolutions are used. Good results for printing yields 300 DPI, but it is better to apply 600 DPI. The DPI for the image to be printed is largely dependent on the printer (or plotter) on which it is printed. There are printers and plotters with a resolution of 2400 DPI or more. Next, the DPI you choose is highly dependent on how you intend to use the image. You can print the same image with different DPI, and use them in different cases.
It is quite easy to change DPI images if you go to a lower DPI value (for example, when you convert an image from 300 DPI to an image with 72 DPI). In fact, such DPI conversion is the most frequent. For example, if you have a digital photo taken with a sufficiently powerful camera (5 megapixels or more), and you want to publish it on your blog, you should greatly reduce either the DPI or the size of the photo. But when printing, you can output it without changing the DPI.
When performing a DPI change, it is important to remember some standard permissions. As already mentioned, 72 and 96 DPI is used for Web pages. Using 150 DPI gives printed images a good quality, but if you want to get good image quality, you should use 300 DPI (or even 600). Sometimes you need to go to a lower DPI, because all other image parameters (the number of megabytes, and the sizes in height and width) with decreasing DPI also decrease.
You can also reduce DPI without changing the height and width of the image. Saving the height and width of the image is possible only when you lower the DPI. In fact, what you do when you reduce DPI images while retaining its original sizes and proportions is simply removing some pixels from the image. You do not change the image itself, but simply make it less detailed.
The DPI image is modified using the appropriate software. For example, our service in many cases performs all the work for you automatically, so you do not have to worry about technical details.
There are programs that allow you to select from a fixed set of permissions (for example, 72 DPI, 300 DPI, etc.). There are also programs that allow the user to enter the desired DPI value himself. When using this program, remember the recommendations in this article about the standard DPI values. One more thing. Although you can separately change the horizontal and vertical DPI, you should not do this without special need.
DPI Convert Tools
This tool supports JPG, PNG, TIF, BMP and ICO. You may change your DPI to any value you like. One other thing to note is that the DPI value of a digital image is sometimes also referred to as PPI (or Pixels Per Inch). A printer produces dots and a monitor produces pixels, so this name attempts to provide context when an image is digital. However, this just serves to confuse things further as the DPI (or PPI) value is only relevant (in practice) outside of the digital world.
As you are now aware of the hacks to resize your scanned photo and signature there are a few Government exams conducting bodies like IBPS,IBPS RRB in which other important documents like thumb impression and handwritten declaration are required to be edited. The candidates are required to first scan their documents and then can use the above mentioned free resizing tool to resize the dimension, aspect ratio, size according to the norms set by the government. You just select the option you want, and the tool will let you crop and resize your document until it fits the dimensions of your choice, type the dimension as prescribed in the application form as the accurate dimension filled will avoid the document becoming blurry and pixelated, so you have high-quality images. Type the dimension as prescribed in the application form as the accurate dimension(eg.height, width, etc). This app will avoid the document becoming blurry and pixelated, so you can get high-quality images. .Once the documents are resized you can simply download and can upload in the application form. Enjoy the hassle-free experience of applying in the government examination.